If you, like me, want to help out with the renovations in your new home but can't hammer a nail without flattening a thumb (yours or anyone's within 3 feet), and you decide to tile your old hearth with a mosaic picture, having NEVER tiled anything before, here is my advise to you: pack up your belongings and kids (or pets, or both), sell the house and buy one with a nice hearth already in place.
If you ignore my advise, I wash my hands of you.
But I am an old softy by nature, so I will give you easy directions and numbered list of what you need to undertake the project that is destined to both excite you and ruin at least 2 fingers and your piece of mind for an undetermined amount of time.
You will need:
- tiles of varying colors, depending on your color scheme and choice of picture. I wanted blues and browns to match my furniture, and my living room view.
- any materials you will be using in the mosaic (I bought small and larger rocks from the Dollar Store)
- a hammer and a cloth bag or large cloth (to hold the tiles while breaking them)
- goggles or protective eyewear that I forgot to wear but you should get because you may not have the Lucky Horse Shoe up your butt like I did and may lose an eye! Retrospect is 20/20, as the apt saying goes....
- tile cutters (both hand held and floor unit if you need strips cut and not just randomly broken pieces)
- wine, scotch or beverage of choice (coffee or tea inadvisable as they may cause you to wake up and come to your senses)
- Ceramic Tile Adhesive (glue for tiling; I had a tub already from my hubby's renovations so I am unsure how small a container you can buy...sorry)
- pencil or pen
- small knife for mesh lifting
- small cup or bowl to hold small amounts of glue as you tile (and an old knife to scoop it out of the main tub)
- measuring tape
- black felt pen
- drop cloth
- broom/dust pan
- notepad or sketchpad
- colored crayons or pencil crayons
- sponge
- trowel
- long flat knife
- knee pads (optional)
- did I mention wine? (not really optional)
- a few rags to muck up
- OPTIONAL IF NEEDED LIKE I DID:
- staple gun and wire mesh and wire cutters
- cement board or some base for mosaic to be made on if you are not building the mosaic right on the floor itself
- saw horses or a table for off-floor creating
- bandages
- toothbrush (old)
- cell phone with 911 on speed dial
OKAY! Time to attack the beast! Click on the photos to enlarge them....
BEFORE PICTURE:

Clean the hearth area of all old tile, glue and debris and make sure it is a level as possible. Measure the space you need to tile. Mine measured 31 inches by 50 inches.
I can't kneel well (bad knees...old Midnight Crab Apple Raid injury...but that`s another story) so while you may be able to draw your design right on the floor hearth area, I couldn`t, and needed my darling, long suffering husband to make me a table/sawhorse-like base to work on. He found an old thin metal bulletin board and it was flat and clean enough for me to draw my pattern directly onto the papery back of it. If you don't have something like this, use a large piece of paper, or multiple papers taped together on a board to use a pattern sheet.

So I choose to use wire mesh. Its super thin and glue would hopefully stick to it. If not, I could always glue a Disney placemat I had in the drawer to the hearth space and go re-watch the entire Downton Abbey series again with the aforementioned prerequisite wine.
Peter cut the mesh for me and fit it to the hearth perfectly. I tried to do this on my own but cut my finger...hence the bandages in the list. I needed a lot of them. Perhaps gloves should be on that list?

Next, find inspiration for your pattern. Mine was our view of the Discovery Passage right outside our living room window. We live on Vancouver Island, BC, Canada. Lil` piece o`heaven.


Sit down with you favorite beverage and/or snacks 'n munchies, and get creative! I drew quiet a few sketches and ended up incorporating a couple to make the final one in the end.


While I was sipping...I mean sketching, Peter tucked in a `drop cloth` under my work area since he knows me so well after 20 yrs together. He just used a pair of my white panties, *seen below...and yes, I have gained a few pounds being married to a German who cooks Schnitzel and bakes Black Forest cakes daily for 20 yrs. Ah well...) *smile*

Crack open your colored pencils and see how your designs work in color. It DOES make a difference in your choices.
*PLEASE NOTE though that once you start looking for tiles, that whole design may change...mine sure did. Colored tiles are very hard to find in a small city or town....so I went to Thrift Stores every day, especially ReStore: Habitat for Humanity, Vancouver Island North to see if they had new ones in...even in singles. Unless you are stinking rich, buying full boxes of tiles is NOT the way to go when making ONE mosaic!

Draw your pattern/picture on the board or paper with the felt pen and don't worry if you mess up....its only the pattern and can be corrected with a few messy strokes or while tiling. NOTE: any circles will be hard to tile unless you have round tiles pieces or the hand strength of Hercules to snip and round off broken pieces! My round bushes disappeared....

Secure the mesh over the pattern and staple it down, but sparingly, as you will need to be able to slip a long flat knife under the mesh now and then to lift it off the board to stop the glue from setting on the board beneath it.
*I actually used a fork now and then for lifting the centre mesh up as the knife wasn't long enough....


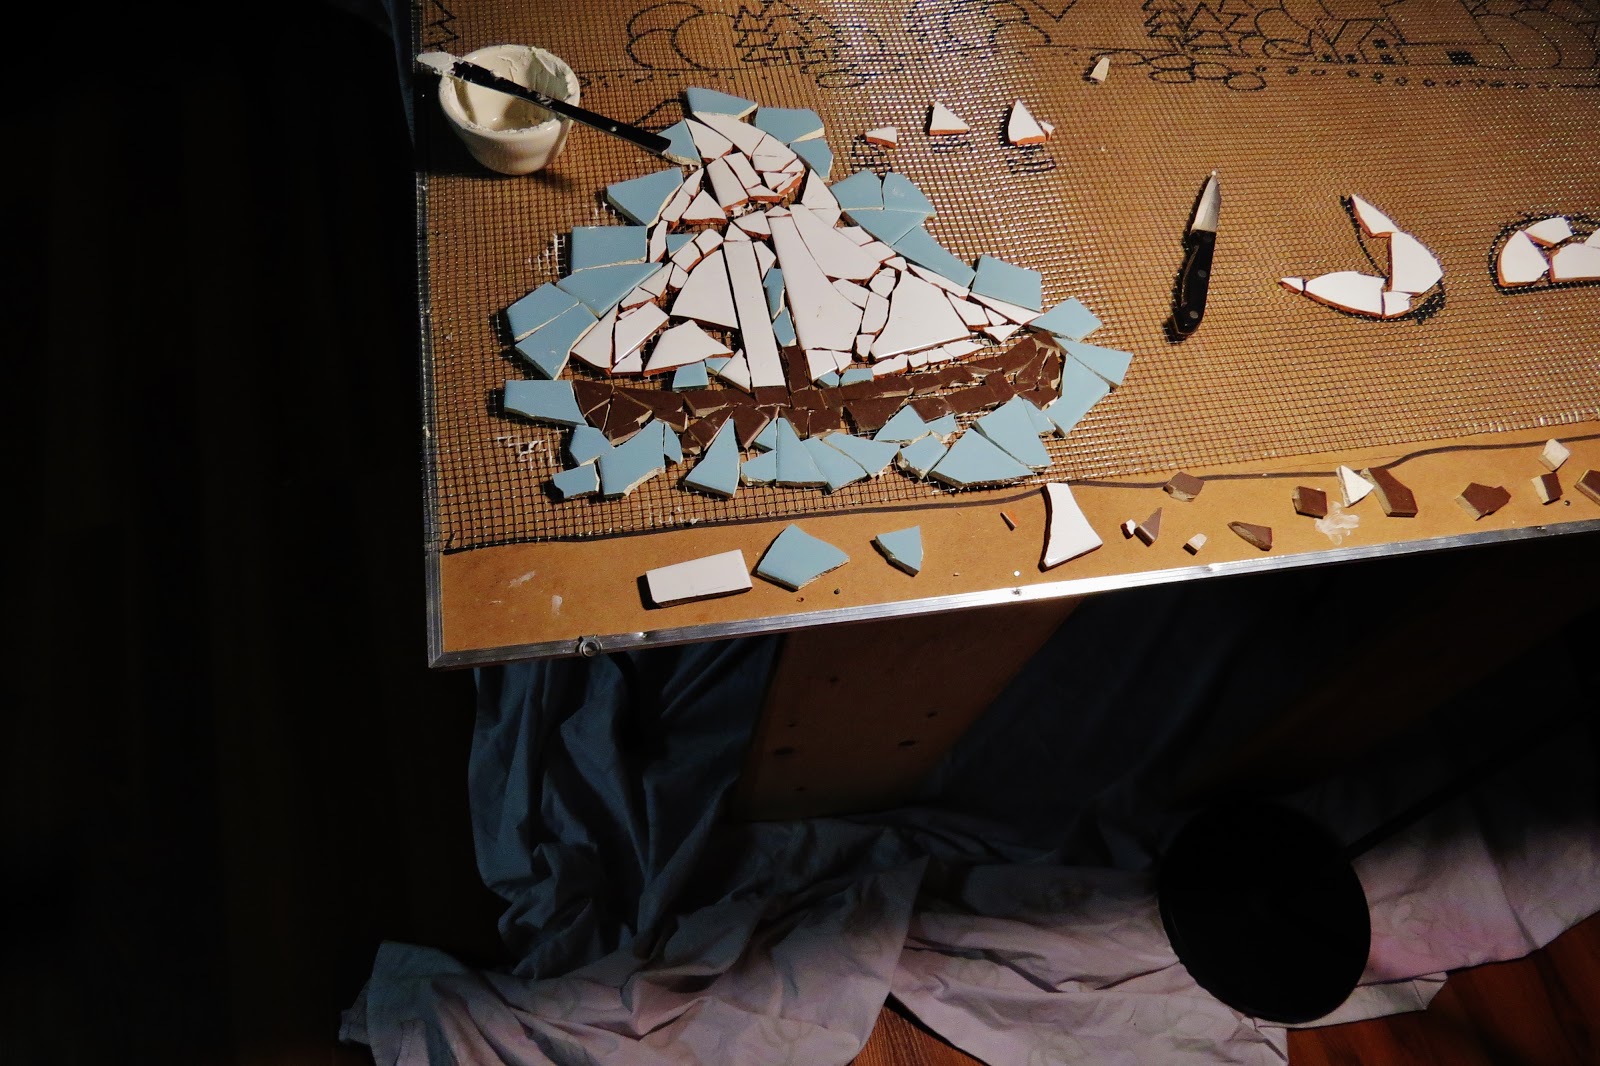
Take your tiles and put them in a cloth bag or towel/rag and beat the living daylight of them. You should get some interesting shaped and pieces. Use the biggest ones first and the ones that suit your pattern best. I busted up all my colors separately and put them in different boxes to make it easy to organize and look for pieces. *NOTE: try not to damage the table you use to abuse the tiles on. I unwittingly punched a couple of holes in the arbitrate top...which I quickly covered strategically with a cloth so Peter doesn't see them until I figure out how to get into the Witness Protection Program with the FBI.


Glue the pieces as you go if you like...I did. I found that I lost track of which were glued and it was a pain to lift each to check over and over. Some may wish to place all pieces first, as it is like a giant puzzle, but there would be hell to pay if someone bumps into it and shift them or knock them down. I would have gone flippyapeshit and earned some heavy jail time. Good thing is, the glue sets slowly and one can remove and change pieces within 4-5 hours and even pop them off when set if need be. Mesh allowed this...I am not sure how a more solid base would react.

None of these pieces below were cut with the hand held cutters....they were all naturally broken. I used the cutter for the smaller pieces and those needed to fill in spaces when the big ones, and naturally shaped ones, were utilized in full first. The floor cutter was used by Peter as he was a tiling contractor and he could cut me the very few straight pieces I need (for the lighthouse only...as you will see).


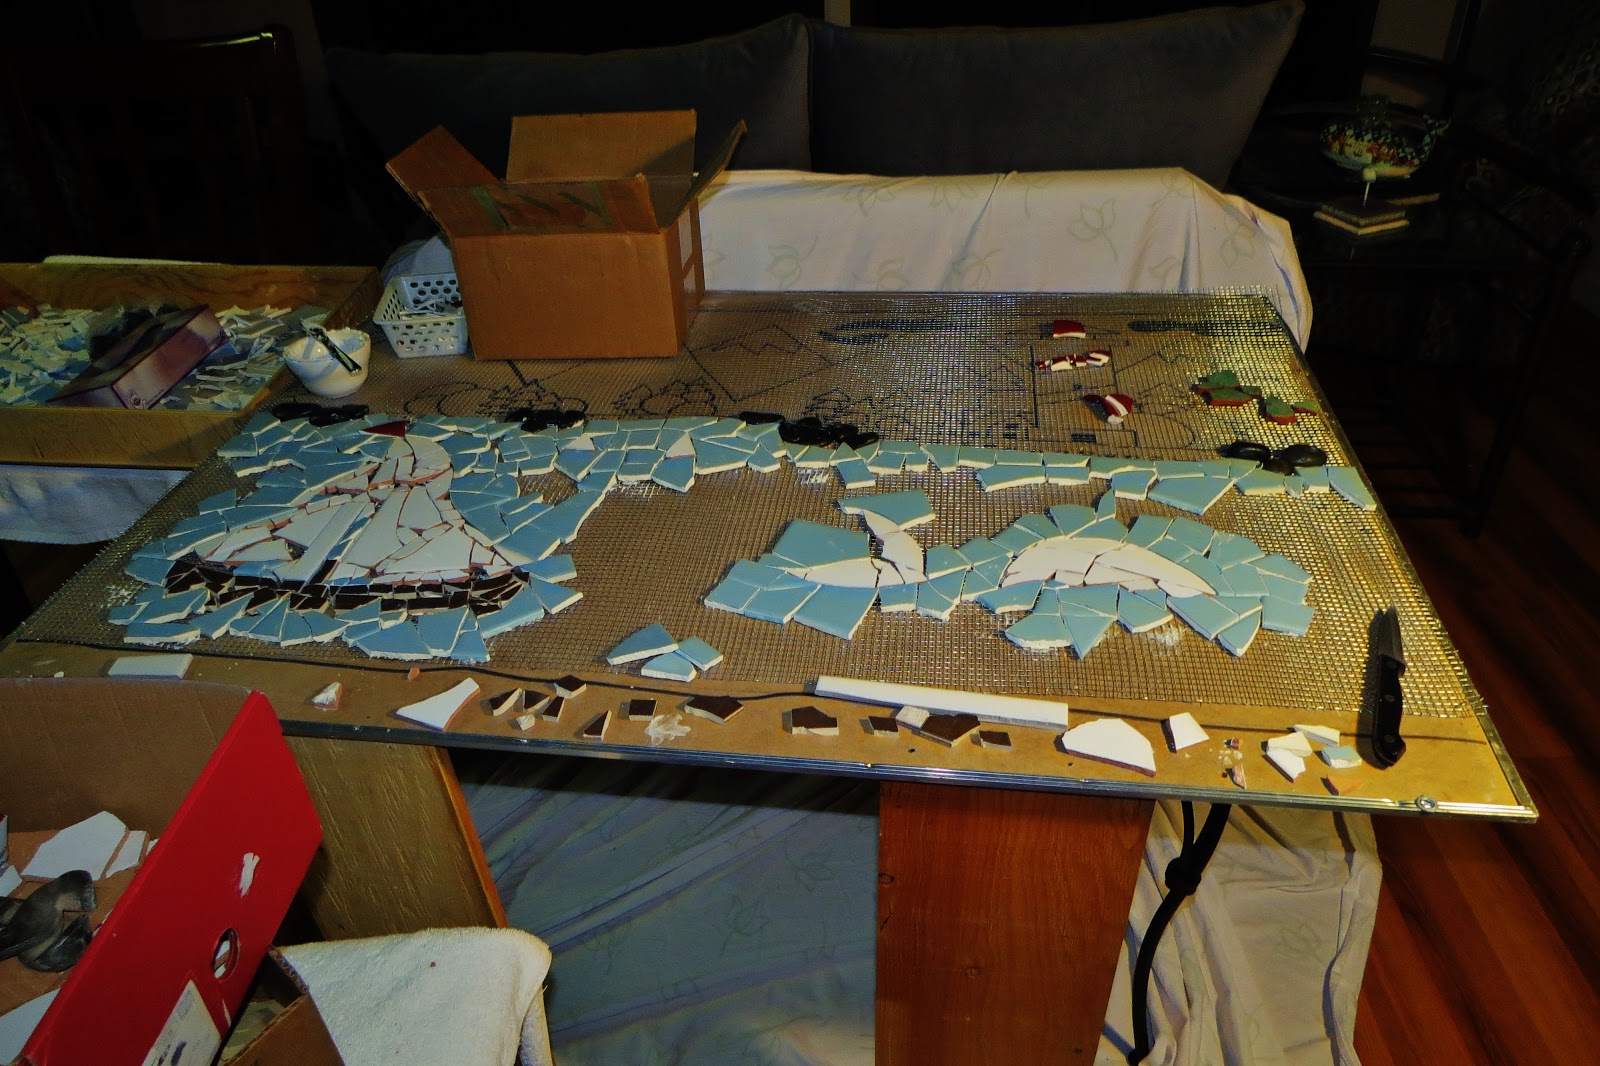
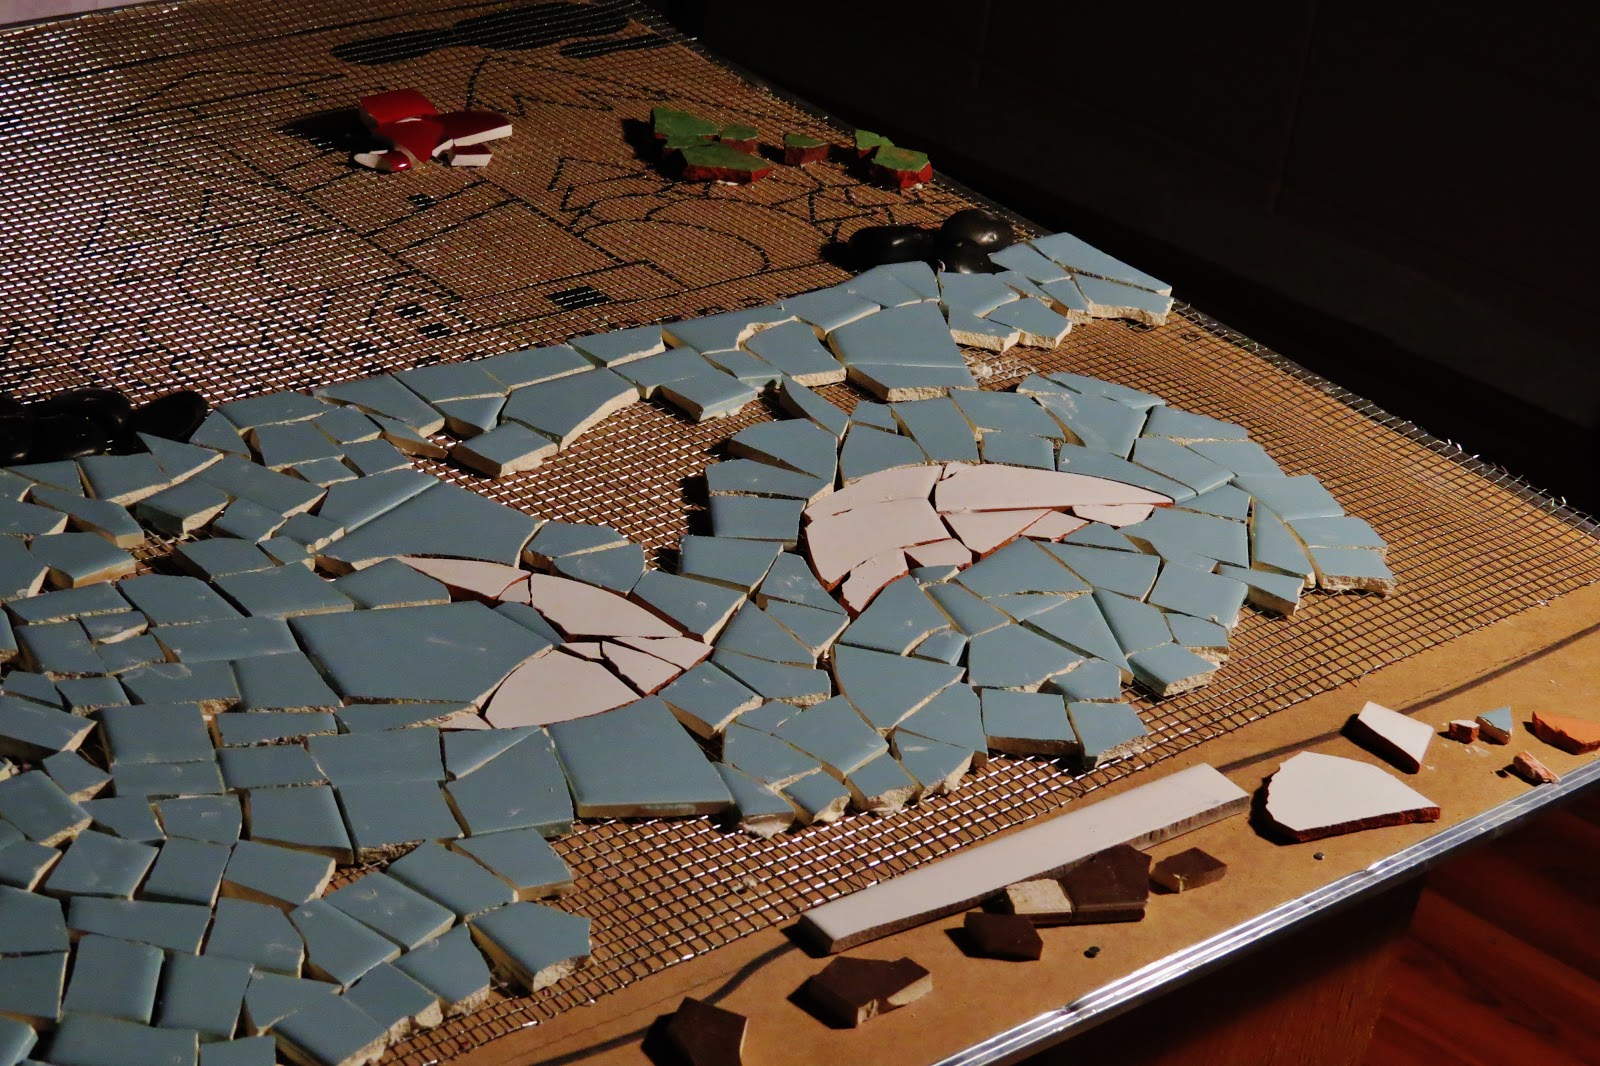
I LOVE Moby Dick and just HAD to have him there!

As you can see, I often worked late into the night...once or twice until 2:00 a.m. Creative Juices do not respect clocks!


The green tile was hard to find and I got lucky at the aforementioned ReStore and even though it was much too thick, I decided then and there that my mosaic would be like a relief map and bumpy as all get out and go! Why fight it? I had already bought the rocks....so be it.

IMPOSSIBLE to find a red tile anywhere, so I bought a red Restore coffee mug, smashed it and got a funky piece that looked flaggy to me. The mug was red and black so I got 2 colors that were hard to find.


Time to bring in the hand held tile cutter....that cut more flesh than tile, I admit. TIP OF THE DAY: Do NOT hold a piece of tile in your palm when cutting it to shape. Trust me.


I tried to make red stripes as that is the typical Canadian lighthouse color...and the red mug gave me some pieces...but I sure didn't like the look much. Too thick and too much in-between space. One WANTS some (either consistently even, or sporadically uneven) space between most pieces for a cool 'outlined' effect when grouted, but not THAT much or that wide. Not to my eye anyway....


The mountain tiles were hard to find too and I got lucky at the ReStore and found a box of singles that had patterns on them...and I utilized that for the look I wanted....even though I hadn't known I wanted it before. Like I said, color and availability of materials can alter things quite drastically!


As you see, I popped out the ugly red tiles and decided blue was neater and forgivable. I found a yellow wall tile and cut it to make the 'light'. The staff at ReStore now address me by name...I am there daily! SO many treasures...

HUGE bloody mess. Lived with it quite happily.

A last minute find by Peter of some red and black ceramic tile-like items allowed me to get rid of the inadequate and heartbreaking blue lighthouse and glue down a patriotic and symbolic red one. Not perfect but best outcome yet.

With the help of my darling, patient and supportive hubby, it was time to lift the mosaic up and transfer it to the floor.

But first...glue to the hearth . A healthy dollop or two...or ten...so all the pieces would be secure by tomorrow: grout day.


A few pieces popped off as we lifted the mosaic up and then down to the floor...damn heavy! but easily fixed. The poor leftover board was quickly trashed.

Perfect fit! Felt odd to look DOWN on it so low after it being waist level the entire time. Glad to see it looked okay from that view too. *WHEW!*

Left to dry 24 hours and cleaned up the living room....finally some semblance of order!

The hours pass.... (view that night form the bedroom balcony)

New day! New challenge! Peter grouted for me as I have...as you may recall...no working knees.


Even I was delightfully surprised to see how it turned out with the dark grout. I had been terribly indecisive for days trying to see it finished with different colored grouts in my minds eye. I settled on a dark grey btw:


While the grout was still damp, I found that a lot of it clogged up around the bumper pieces and stones and some color and shape was lost, so I (stupidly) scraped here and there with my fingernail to reveal hidden tiny tiles and defined treelines etc. After wering my nail to a nub, I clued in and used the butter knife and an old toothbrush to define things better.


*this angle shows you the 'relief map' quality of the mosaic...

It was then time to put together a frame-like border. I chose some thin wood trim and Peter cut and nailed it into place.

*I think it's time to add a fave pic of the moon I took from our balcony around Nov 9th. It wasn't this big, but darn close...so amazing. Maybe inspiration for another mosaic? (*slaps self on the head and looks again at ruined nails and blood blistered palms)

After a final inspection by our resident Princess, Jasmine of House Kitty Paws, who was awfully keen on sniffing out Moby Dick....
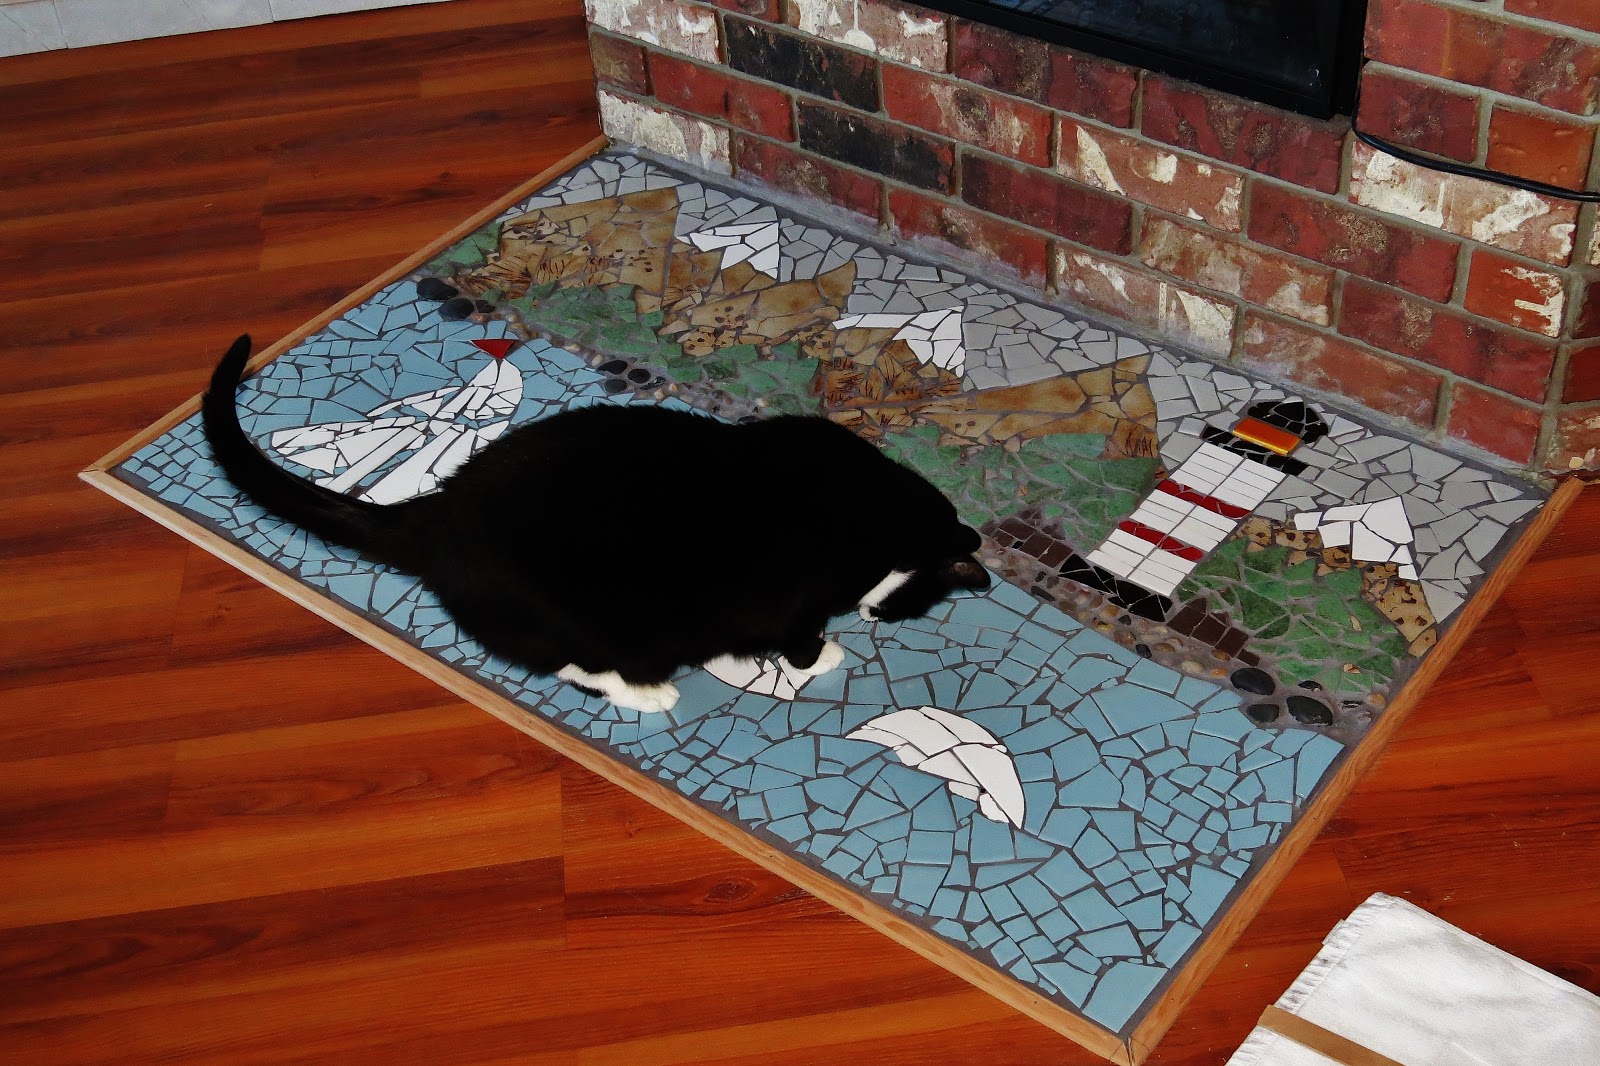
...it was time to stand back and view the hearth with 'Thank God that is done with then!' eyes.
AFTER PICTURE 1:

Hope you enjoyed my project...and I hope you never curse my name when you inevitably start using up the bandages with your project, and feel free to ask me any questions in the comment section. I will probably lie and make this seem like a lot of fun so I have others suffering with me.
CHEERS!!
Sprayed a sealant on the mosaic and signed it as my hubby said it was a 'work of art'. How sweet! *smile*
CHEERS!!
Sprayed a sealant on the mosaic and signed it as my hubby said it was a 'work of art'. How sweet! *smile*


Nice and shiny...and I am pleased. Merry Christmas to you all and good luck in your future projects!
AFTER PICTURE 2:


February 2018

